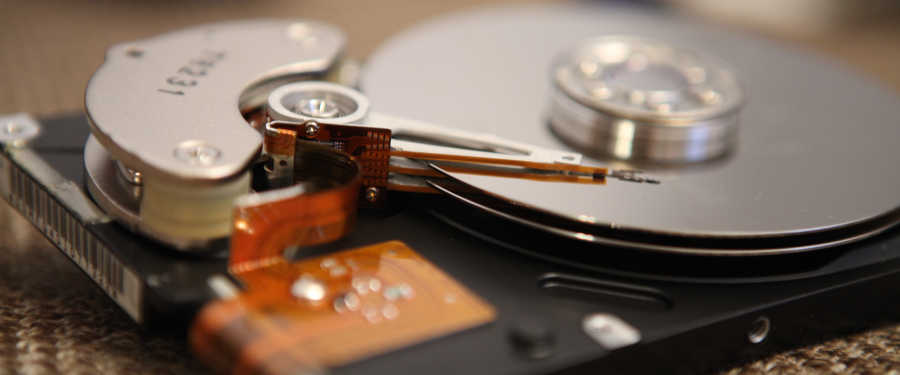
Acronis Drive Monitor Review – It’s S.M.A.R.T!
Everyone has a problem with their hard disk crashing at some stage and I am no different! In an attempt to anticipate when it might start to become a problem I have been using Acronis Drive Monitor. This post describes how to get it and how to use it and my experiences with it so far.
Installation & General Use
The program is supplied as a free utility and can be downloaded from Acronis here. You need to supply your name and email address but there is no confirmation email link that needs to clicked to confirm your identity.
The website at the time of writing states the support is available from Windows XP up to Windows 7; there is no mention of Windows 8 at this time but that would reasonably be expected to be available sometime in the future. Some versions of Windows Server are also supported.
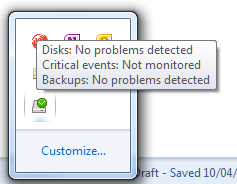
Once downloaded and installed, the Drive Monitor appears as an icon in the system tray and hovering over it provides a summary of the current status. If there are issues, then Drive Monitor will also bring up an information box highlighting the problem. For general use therefore that is all you need to do, the program will run in the background and alert you when your hard disk is starting to show signs that you need to be concerned with, and “no news is good news”!
Detailed Usage
Should you start to encounter warnings, or just want to look at the SMART settings in more detail, you should access the program, either through double clicking it in the system tray or by starting it from the program menu (Default location: All Programs –> Acronis –> Acronis Drive Monitor). Note that dependant on the user account controls on your PC you may be asked to supply permission to access the program when you carry out one of the above steps.
The screens that you are presented with are shown below. Note that these are all for a problem free disk, we will cover what is shown when you have an failing disk later in the post.
Main Pages
These are the main pages that Drive Monitor will show. Note that I have turned the critical monitoring activities off – these are events that Windows produces that are disk related, my experience is the standard disk management that Windows carries out results in lots of low priority warnings that are just a distraction.


Option Pages
There are a number of options that can be set up, ranging from setting the disk temperature warning points through to how the disks are monitored. Note that is also possible to be sent an email when problems arise.


Failing Disk
When a disk is starting to show problems, these will affect some of the SMART parameters that the disk reports and Drive Monitor uses those to give a view on how healthy the disk is. Shown below are similar screens to those shown earlier in this post, but taken from a different PC in my house. Note that in this case one of the drives is indicating an issue. In these screens a number of sectors have been reallocated as the original sector has shown data corruption. As a result of that re-allocation, Drive Monitor has reduced the health rating to 30%.


Depending on the nature of the failure, you may wish to consider replacing the drive as soon as is practical. In other cases, it might be more appropriate to keep a close eye on the stats and see if they worsen any further. Acronis give some information on their website how to set up a monitoring approach, the information can be seen here. At the moment I have set this up on the problem disk and will continue to keep an eye on it to see if it worsens, see the screen shots below.


Summary
When Acronis Drive Monitor was first released in 2010, it seemed to get some bad press in reviews at that time as it didn’t seem to work with some drive types. Acronis seem to have continued to work on it and it now covers all drive types with a small number of known problems. Disk drive manufacturers also supply diagnostic tools for their particular drives but only for their own drives so they are not as general purpose as this.
While monitoring key SMART parameters is not a guaranteed way of predicting drive failures (Google’s research seems to indicate it is good for around half of disk crashes), I am hoping it will (in most cases) allow me to swap out disks before they fail catastrophically.
I currently have a unit that is showing reallocated sectors (a key parameter to watch according to Google) and will provide updates to this post in coming months.
Update 20th Sep 2013: An additional sector failed and as a result I added a further 20 to the “raw offset” count to cancel out the increased “raw value”. I do not intend to change the drive yet, still keeping a watching eye!
Update 6th Feb 2014: Yet another sector failed and as a result I added a further 19. Still sticking with it though!
Update 11th Aug 2014: Yet another sector failed and as a result I added a further 16. The rate of failure doesn’t seem to be increasing though so still monitoring it.
Update 26th Apr 2015: Another 18 added. Still seems a suitable slow degradation though.
Update 6th Nov 2017: Another 40 added. Disk has been operating for 13000 hours now.
Further Reading
- How Acronis calculate the disk health
- Users Guide for Acronis Drive Monitor
- Failure Trends in a Large Disk Population (Google research paper)
- Backblaze comparison of drive reliability from different manufacturers
Featured image by Art Wall – Kittenprint on Unsplash