not fully secure – my problems with moving to https
The process for moving your site from http to https is in general a very straightforward process but when moving my WordPress site over I encountered some specific issues where the site was reported as not fully secure. Whilst they are possibly unique to my site I have posted them here in the hope that they may give some pointers for your site as well.
General process for migration
- Set up an SSL certificate for your site
- Fix any issues on your site
- Redirect all http references to the new https.
There are lots of websites that describe the process above and one of the best ones I have found can be found here.
Where it went wrong
Once I had followed the first step of setting up an SSL certificate, it should have been possible to go into a web browser and type in the new secure url and still see the same page but now with a padlock shown. In practice that didn’t work for me, I was still seeing a not fully secure icon.
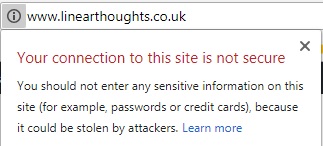
http site – not secure
Below shows the image that I see in Chrome before the https url is selected. This is entirely as expected.
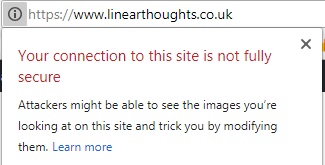
https site – not fully secure
Below shows the image when the https prefix is added and as can be seen some progress has been made but we are not there yet!
Finding the faults
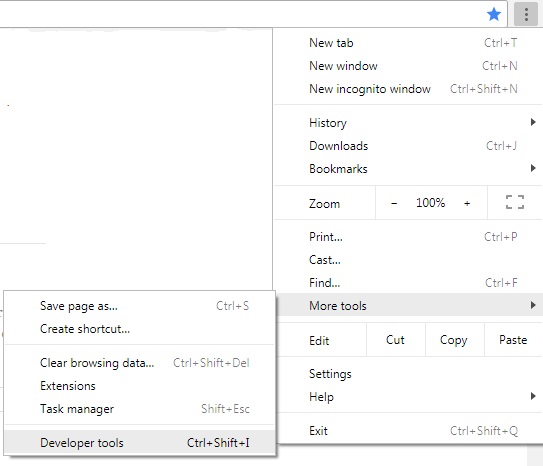
The easiest way to find the not fully secure faults (using Chrome) is to use developer tools. When your website is being viewed, select “More tools” then “Developer tools” or use the keyboard shortcut Ctrl+Shift+I. See the image below for more details of this.
Once the developer tools have been started, the source code for the web page will be displayed (it will be on the right hand side by default but may have been changed). At the top of the developers page the errors can be seen
and clicking on that gives a detailed error listing
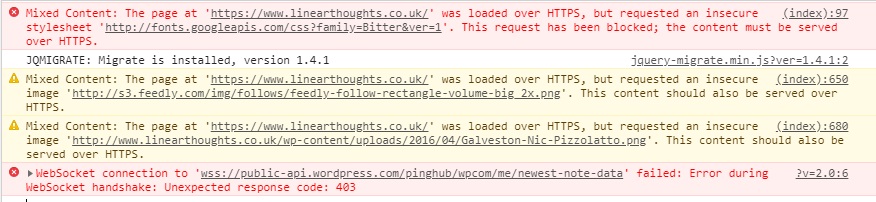
These mixed content errors are the ones we need to fix to get rid of the not fully secure warning and to get a padlock symbol in our address bar. Note that the web socket error is not a factor. If you want to see the full website before my edits it can be seen here. Note that these are the warnings that came up on the home page, some other warnings were later encountered on individual pages.
How I fixed them!
Home Page – Warnings
If we look at the warnings first (the yellow boxes), these were both created by widgets that had an http format of URL in them. In the case of the feedly one, I wasn’t getting any interest from my readers on it anyway so I just used this as a opportunity to clean up the page and removed the widget entirely. In the case of the Galveston-Nic-Pizzolatto link, this was a link to a file on this website and this was fixed by editing the link in the widget, i.e. by changing http to https.
Home Page – Errors
The error (first red box) is a bit harder to fix because you need to find the file with the URL in it. This could have been generated through a number of routes – e.g it could be hard coded into the html that forms the theme or it might be getting generated using code, which in the case of WordPress is almost always going to be PHP. As I self host this website, the easiest way for me to find the problem in my Origin theme was to ssh into the server and then do a search for “Bitter” using grep. In my case that showed me the problem was in my “wp-content/themes/origin/admin/customize.php” file. Having found the file concerned, changing it was straightforward, although I did that directly on the server as I couldnt get the editor in wordpress (4.9.7) to do it correctly. A warning is appropriate here – always back up files of this type before editing them – if the edit goes wrong you can bring down your whole site!
Individual Pages
Having fixed the above issues, I then brought up individual posts to see how they performed. I mainly encountered issues with the posts that used NextGEN Gallery and managed to fix these by clearing the cache; there is an article on how to do this here.
Note that if you are using a cache (I use WP Super Cache) you should either turn the caching off entirely (which is the approach I took) when you are doing these changes or keep clearing the cache after each step.
Editing .htaccess
Once you have addressed all of the errors/warnings and you have a secure padlock on each of the posts, you should then redirect your website to always use the https:// link. The article referenced at the start of this post gives an example of how to edit your .htaccess file to do this. Again this is a file you are recommended to back up before editing as errors can bring down your site!
If have turned your caching off, now is the time to turn it back on.
Having completed all of the above, I now had a website working reliably on https, I hope it has given you some pointers to help with your migration as well!.
The padlock image used here is by MabelAmber®Pluto5339 , original can be seen here, it is in the public domain .